PSMailers Pressure Seal Solutions

Top 10 Reasons to Buy PSMailer's Pressure Seal Equipment & Documents

Posted by PSMailers Guy on Mon, Aug 5, 2013 @ 17:08 PM

PSMailers offers many great reasons to invest and save your organization time and money. So, we have created our top ten list of reasons to bring PSMailers into your organization. Check it out and let us know if you agree.

  1. Single Source for All Pressure Seal Equipment & Document Needs
  2. Responsive Sales, Customer Service, Manufacturing & Engineering Support Teams
  3. Durably Engineered Gears Produce Long-Lasting Quality Equipment
  4. Accurate Fold Plate Guides Prevent Plate Misalignment
  5. Tolerance Guidelines Strictly Followed to Prevent Damage to Shaft and Rollers
  6. World Class Manufacturing Standards Ensure Quality Testing on All Equipment Parts & Machinery
  7. Mandatory Document Performance Test Conducted Before Every Machine Ships
  8. Quality Control Standards Continuously Monitored on All Equipment & Documents
  9. Manufacturing & Customer Service-Driven Continual Improvement Process In Place
  10. 100% Reliability Standards on All Equipment & Document Inventory and 100% Stable Pricing

To download a PDF of this list, click here. And to see check out all of PSMailer's equipment and documents, go to our equipment model guide and/or our document styles details. If you have any questions, please feel free to fill out this form and contact us.

PSMailers Equipment

Topics: pressure seal equipment, pressure seal documents

Perfect Folds with Pressure Seal Machine Fold Plates

Posted by PSMailers Guy on Thu, May 23, 2013 @ 11:05 AM

pressure seal folder plateMastering Fold Plate Technique

Every PS Mailer folder sealer machine has two fold plates, an Upper Fold Plate which is the larger of the two and a Lower Fold Plate, a bit smaller. Each one has its own functional location and cannot be interchanged. Proper insertion of the fold plates is essential to achieving perfect folds every time.

Positioning the Upper Fold Plate

Position the Upper Fold Plate (larger) on the front end of your PS Mailers folder sealer machine where the forms are dispensed in their final folded format. Looking at the numbers on the Upper Fold Plate, think of it as a ruler and position the fold plate so the lowest numbers are inserted into the PS Mailers machine first, closest to the rollers. The largest numbers on the Upper Fold Plate should be at the end of the model, farthest away from the major mechanics of the PS Mailers machine. As the Upper Fold Plate is inserted, it should fit easily and at a slight angle. To ensure the Upper Fold Plate is firmly in place, look underneath the plate and verify the cutouts sit securely on top of the four black pegs. With a firm grip, apply slight pressure downward to ensure a properly secured fit.

Positioning the Lower Fold Plate

The Lower Fold Plate (smaller) is placed on the back side of the PS Mailers folder sealer machine and sits parallel to the motor cover. Again, looking at the numbers on the Lower Fold Plate and thinking of it as a ruler, position the Lower Fold Plate so the lowest numbers are inserted first and are closest to the rollers. The highest numbers should be farthest away from the main mechanics of the PS Mailers machine. Ensure the Lower Fold Plate is firmly in place by looking underneath the plate and be certain the cutouts sit securely on top of the four black pegs. With a firm grip, apply slight pressure downward to ensure a properly secured fit.

Proper Fit, Perfect Fold

Proper fit of both fold plates is essential to getting the perfect fold every time. If you periodically clean the PS Mailers machine, be sure to follow these fit techniques afterward to ensure smooth and perfect operation as well as perfect folds.

Thanks for visiting today. Check back soon for more tips on getting the best performance from your PS Mailers investment.

Let me know if you have any specific questions. That’s what I’m here for. Click below to submit your question today.

Click to Send Questions

Topics: pressure seal equipment, fold plates, equipment techniques

Help! My PSMailer Pressure Sealer Machine Won’t Turn On

Posted by PSMailers Guy on Wed, Mar 27, 2013 @ 11:03 AM

Remember the Pressure Points for your Folder SealerDon’t fret! It’s most likely one of four simple pressure points that just needs a little push. Four subtle, yet mandatory buttons or levers must be depressed - or as you have discovered - the machinery won’t operate. So, let’s get familiar with all of the mandatory ON buttons on your PS Mailers pressure sealer machine.

Location # 1 - Side Access Door

Inside the Side Access Door, feel around and you’ll find a button that if not depressed, prevents the machine from running. When the door is closed, the button will depress automatically. So, make sure the Side Access Door is fully closed.

Location # 2 - Toggle Switch & Fold Plate

Correct insertion of the back fold plate is key to the pressure sealer machine being fully operational. When the back fold plate is installed in its final resting position, it depresses a toggle switch located on its right side. The depressed toggle switch is what tells the pressure seal machine to run forward. [Does not apply to the PSM1800.]

Location # 3 - On/Off Switches

Okay, I know this seems like the most obvious button, but notice I said, “ON/OFF Switches.” Depending on the model you have, there could be two “ON/OFF” mechanisms and they both have to be in the ON/depressed position. The main power switch must be in the ON position. Then, make sure the RUN button on the control panel is pressed when you’re ready to start processing your pressure seal documents. If you have the PSM1800 or the PSM3000, you only have the ON/OFF button on top of the machine.

Location # 4 - Reset Button

Make sure the Reset Button is depressed and, therefore, in the ON position. It’s located on the back of the machine near the main plug. If it’s not depressed (or has been “tripped”), the pressure sealer machine won’t run.

Always remember these four simple spot checks. They’ll typically get your PSMailers pressure sealer machine running smoothly once again.

Check back soon for more helpful hints on maintaining your pressure seal investment.

Have additional questions not covered here? I’m ready to help. Ask your questions today.

Click to Send Questions

Topics: folder sealer tips, pressure seal equipment

C Fold or Z Fold? Figuring out Fold Style for Pressure Seal Documents

Posted by PSMailers Guy on Wed, Feb 20, 2013 @ 11:02 AM

C-fold or Z-fold

Identifying the fold style is the first and most important step in getting the results you need from your PS Mailers pressure seal investment. Determining the fold style is key to setting up the PS Mailers equipment to run the pressure seal documents properly.

Step 1: Identify the form size. Is it 8½" x 11" or 8½" x 14"?
Step 2: Is it a check? Go on to Step 3.
Is it a form? Skip to Step 4.
Step 3: Where is the check location?
If the check is in the middle portion of the document, you have a Z fold.
If the check is in the bottom portion of the document, you have a C fold.
Step 4: (FOR CHECKS OR FORMS)
Identify whether it folds like an "accordian" Z fold or a "typed, formal letter" C fold.
Step 4a: (FOR CHECKS OR FORMS)
Here's where it gets a little sticky...identifying glue patterns on the form actually can help determine the fold style. Crazy, but true!
  • If there is glue all around the form AND it folds in two equal panels, then it's a V fold.
  • If there is glue all around the form AND it folds in three equal panels, it's a C fold.
  • If there is glue ONLY around 2/3 of the document, it's a Z fold.
Step 5: (FOR CHECKS OR FORMS)
Determine whether each panel is the same size or different sizes.
  • If you see three equal size panels, it's either a Z fold or a C fold. [Take a quick step back to Step 4 and determine whether is folds like an accordian or a formal letter to make the final determination of whether it's a C fold or a Z fold.]
  • If a return envelope is part of the document, it's an Eccentric C fold (Ecc. C for short!).
  • If you see two larger panels in the top and middle positions and one smaller panel in the bottom position (where you'd find the return address and mail-to address), it's an EZ fold.

Pressure seal technology brings incredible efficiency to any busy office. Because every business processes documents differently, PS Mailers offers six different fold styles compatible with PS Mailers pressure seal equipment. What types of applications do you use pressure seal documents for? How does pressure seal increase your office efficiency?

Using your PS Mailers pressure seal equipment regularly? Next time we’ll talk about cleaning products you can safely use on equipment.

In the meantime, click the button below for more information on PS Mailers pressure seal equipment and documents. We’ll get it to you right away.

Click me

Topics: pressure seal, z fold, pressure seal equipment, pressure seal documents, c fold

7 Easy Steps to Setup Pressure Seal Equipment

Posted by PSMailers Guy on Thu, May 24, 2012 @ 16:05 PM

Pressure seal equipment can help manage the labor costs spent on time-intensive tasks such as manually folding and sealing envelopes for bulky mailings. Setting up pressure seal equipment for use when purchased takes just seven easy steps... and seven may sound like a lot at first, but I'm including steps like Step One: be careful taking the machine out of the box because it's really heavy! Don't forget that with any of the more technical steps, we have trained (friendly!) support staff ready to guide you through the process.

Let's get started.

Step One: Unpacking your pressure seal equipment

The weight of your new pressure seal equipment and tool kit is at least fifty pounds, so when taking it out of the packaging it may be necessary to have an extra person or business employee on hand to help you lift it properly and avoid the chance of serious injury. 

Step Two:  Insert the paper guides and adjust to the proper width.

One thing that can slow down business productivity is when paper gets jammed in the equipment, preventing it from working properly. This problem can be avoided using the paper guides. Carefully insert the paper guides and adjust to the proper widths to ensure documents will load and print efficiently.

Step Three:  Position your Fold Plate Stops.

You need to verify that both Fold Plate Stops are set to the correct position to the form-style you will be using for your mailings – Z-fold, C-fold, EZ-fold, or V-fold. 

Step Four:  Install the Fold Plates

Both the upper and lower fold plates must be installed according to instructions to ensure your pressure seal equipment works effectively.

Step Five:  Follow procedures to plug-in the machine

Plugging in your pressure seal equipment is certainly simple enough, but to ensure that everything continues smoothly it helps to first plug the power cord into the machine before plugging it into the wall outlet.

Step Six:  Turning on the machine

Flip the lower power switch to the “On” position and give your machine a few minutes to warm up. Your pressure seal equipment is almost ready to use.


time savingsmoney savings

(Get excited, you're about to save time and money!)

Step Seven:  Running the Machine

To run the PSM1800 machine, you can push the Start/Stop Switch on the machine's Control Panel. The feed system is preset, but if adjustments need to be made, you can refer to your Operator’s Manual. Remember when loading the machine, the glue leading edge should be facing upward.

Now you're ready to start doing business more efficiently!
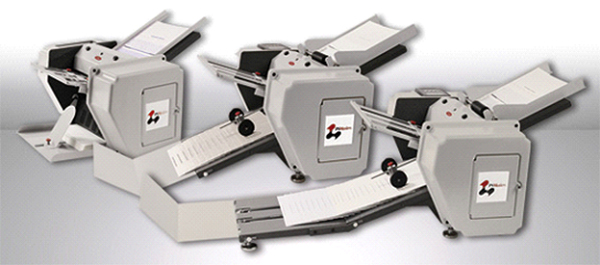
Topics: pressure seal equipment, pressure seal method, company efficiency, pressure seal installation guide